How to Build a Jekyll Blog for FREE
8 mins read.

.webp)
In this blog, I will walk you through the process of building a Jekyll blog for FREE. You will learn the step-by-step process of building a jekyll website.
So you finally decided to build a blog that costs you nothing. I am sure you have read the benefits of building a blog before taking the decision. Buckle up, as I take you through the next part which deals with building a free blog with Jekyll on Github pages.
To make you navigate through the blog in an easy way, I divided this blog into two parts:
In 2017, I created my first ever blog on WordPress and it was an awesome experience. The process was not at all time consuming, let alone cost-effective. Since a lot of marketing experiments deal with Wordpress, it was obvious to be my initial choice. However, I wanted to experiment with something different; something which makes me learn one thing or two.
I stopped working on Wordpress as I invested a major chunk of my time learning HTML, CSS, and Javascript. SEO was not new to me; I am doing it since the beginning of my career. I wanted to do something more interesting.
In 2019, I decided to build my personal site on Github. I played around with Bootstrap for a while but found it time-consuming. The other day a friend of mine mentioned the concept of static-site-generators to me, I found it appealing. Since my favorite note-taking format remained Markdown, I liked the concept at first glance.
Wordpress was always an alternative for me but I dislikened the whole process of choosing, buying and renewing the hosting and domain name. With Static-site-generators, I had the option of serving the HTML on Github pages for FREE. Here’s why I settled on Jekyll using Github pages after trying out several Static-site options such as Pelican and Hugo. Of course, I had my other reasons to support the decision such as speed, cost-savings, security, maintainability, and customizations.
Let’s take these advantages one-by-one:
One of the main reasons for choosing Jekyll over Wordpress would be the cost.
Wordpress makes your pocket loaded with investments like domain name, hosting (webserver), PHP and a database. Although most hosting plans give you a good deal for the first year but after a couple of years, it does get pricey.
For me, since I have hosting and domain for about three years, this came out to Rs. 2500 (hosting for 3 years) + Rs. 1000 (domain for 1 year). With static sites such as Jekyll, the cost goes down to Rs. 0/year (or only Rs. 1000 if I want a .com domain extension). What’s more, you can host your static site for free using platforms like Github Pages and Netlify.
Another solid reason to build a blog with a Static-site generator is speed.
Wordpress gives you a dynamic way of loading the content live in a database, which gets converted into HTML only when a user wants to see the page. The entire process is request-heavy with steps like building the page from a template or theme, grabbing the content and sending the completed page to the user.
With Jekyll or any other static site, the whole site gets uploaded to the server as a folder full of assets (HTML, CSS, images, etc.). The entire process of requesting and fetching the content is seamless as the assets are already statically loaded on the server. This improves the page load speed significantly. With Wordpress, however, you still need to optimize the performance and speed with a variety of plugins which slows down the website. If you are still not convinced, Nikola has written a nice blog on the topic: “Why Static?”.
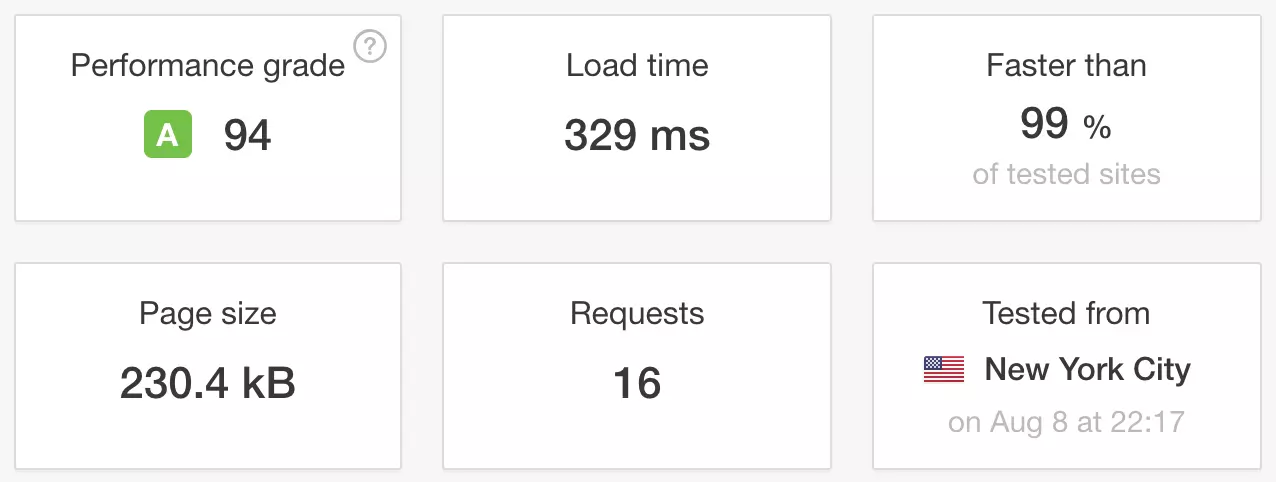
Below are tests I ran using the Pingdom Website Speed Test on my WordPress and static site.

When was the last time you heard someone telling you to update your CMS and plugins for better security in Wordpress? If the stats are to be believed, over 70% of all WordPress installs are vulnerable to known security glitches.
Static sites, on the other hand, give you a free hand to experiment with your code without having to worry about malware. Static sites are built on a production machine (probably the machine you are reading this on) by static site generators, which take your code and spit out flat HTML files with CSS and JavaScript. When a user requests a page from your site, the server just sends them the file for that page, instead of building that page from various assets each time. No build process means standard hacking attacks like scripting or database security exploits just don’t work.
The other day I was looking for options to build a static-site, the numbers are overwhelming. At the time of writing this blog, there are over 463 options to build a static site. And the numbers are increasing day by day!
Remember I mentioned about trying options such as Pelican and Hugo for building a blog. It was fun playing with them but I decided to stick with Jekyll. I will tell you exactly the reasons for choosing Jekyll as a static site generator in an upcoming blog.
Although you won’t require much language knowledge to get a static site up and running, I would still recommend you to polish basic HTML and CSS skills. You will require them during website customization. As an addition, I would recommend you to learn basic Git commands to work on Ubuntu.
Now that the prerequisites are known, let’s move on and learn how to build a blogging website with Jekyll for Free.
First things first, let’s install Jekyll on your computer
Since Jekyll is a static site generator, there is no involvement of the server, database, and backend. All you need is to have a local copy of the site on your computer. You will edit the local files on your machine directly and deploy the changes to the Github repo which is the online version of the site.
To work with the local copy, you need to install Jekyll on your computer. The first step would be to update all the system packages in Ubuntu to their latest release.
sudo apt update
sudo apt -y upgrade
sudo reboot
To work with Jekyll, you will need to have a working Ruby development environment which includes libraries. Use the following commands to install Jekyll and various build tools required:
sudo apt -y install make build-essential
Install Ruby package and development tools:
sudo apt -y install ruby ruby-dev
The next step would be to instruct Ruby’s gem package manager to place gems in the user’s home directory. Add Environment variable to ~/.bashrc field.
echo '# Install Ruby Gems to ~/gems' >> ~/.bashrc
echo 'export GEM_HOME=$HOME/gems' >> ~/.bashrc
echo 'export PATH=$HOME/gems/bin:$PATH' >> ~/.bashrc
source ~/.bashrc
Use gem to Install Jekyll and Bundler which is a tool used to manage gem dependencies.
$ gem install bundler
Fetching: bundler-2.0.2.gem (100%)
Successfully installed bundler-2.0.2
Parsing documentation for bundler-2.0.2
Installing ri documentation for bundler-2.0.2
Done installing documentation for bundler after 2 seconds
1 gem installed
Install Jekyll on Ubuntu with the following command:
$ gem install jekyll
This is the thing I like about Jekyll: an extensive theming system. With Jekyll, you will find almost dozens of communities that offers community-maintained templates and styles to customize your site’s presentation.
You can find and preview Jekyll themes on the following galleries:
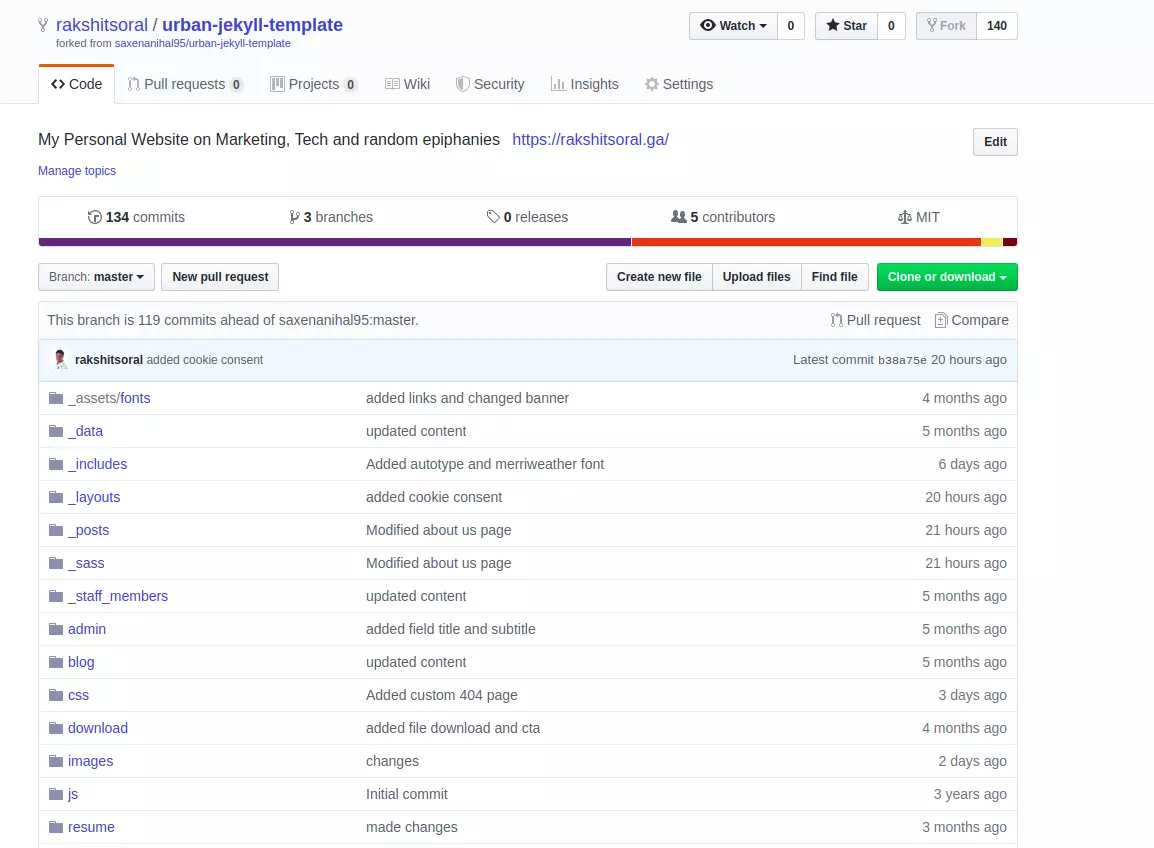
To install a theme, navigate to the theme’s Github Repo and fork it. In my case, I used Urban Jekyll template on my Jekyll website. Here’s a fork for the same:
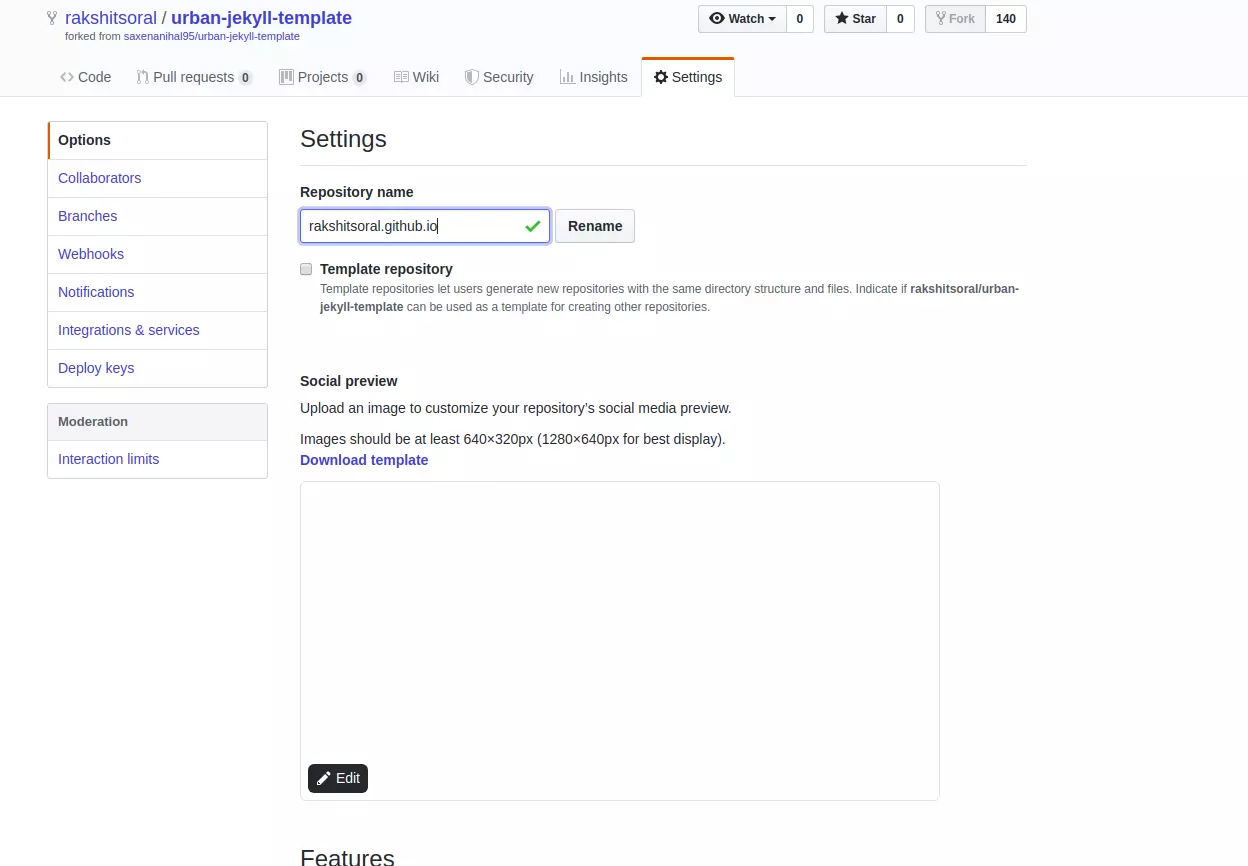
The next step will be to rename the repository to username.github.io. In my case, I shall rename it to rakshitsoral.github.io.
Now clone the repo to your local machine:
$ git clone https://github.com/rakshitsoral/urban-jekyll-template.git
Now move to the folder containing all the files:
$ cd urban-jekyll-template
Initialize the git repo
$ git init
Run the site on your local machine:
$ bundle exec jekyll serve
Navigate to http://localhost:4000/ and Voilla, your site is live. It should look like the following image:

It doesn’t look bad, does it?
There you go! In this part, you learned how to build a FREE blog using Jekyll. In the next part of the series, I would walk you through the way I customized the whole site. It will include modifying the home page, setting up the Goodreads quote widget, adding recent posts widget and a lot more.
Untill then, Saayonara!